Kawaii Mermaid Sublimation
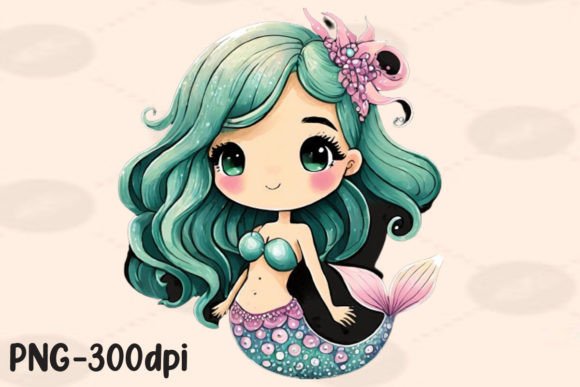
If you have seen vibrant, pastel-toned designs featuring smiling sea creatures, starfish, scalloped fins, and dreamy bubbles, you have likely encountered kawaii mermaid sublimation. This style combines the adorable, childlike charm of Japanese kawaii culture with the whimsy of mermaids and ocean themes, printed onto fabrics, home decor, and accessories using dye-sublimation. The final result is bright, durable, and soft to the touch—perfect for everything from leggings and t-shirts to tumblers and throw pillows. Many creators, small business owners, and hobbyists are drawn to it because the aesthetic appeals to children and adults alike, especially for beach-themed parties, birthday gifts, or simply adding a little joy to everyday items. However, getting that flawless mermaid tail or sparkly seashell to transfer perfectly takes more than finding a cute design and pressing it. Without attention to a few key details, you can end up with dull colors, ghosted outlines, or a finished product that looks nothing like the preview.
The Resolution Trap: Why That Design Looks Blurry After Transfer
One of the most common missteps is assuming that any PNG file with a cute mermaid will work well for sublimation. Many people download images from free graphic sites without checking the actual pixel dimensions. When you sublimate onto a larger surface—say a 12-inch by 12-inch pillow—that 500 × 500 pixel image will stretch and appear pixelated. The fins become jagged, the eyes look smudged, and the overall effect loses its polished, high-end feel.
What to check instead: Always verify the resolution before you buy or download. For sublimation, you want a minimum of 150–300 DPI at the target print size. If the design is 6 inches wide, aim for at least 900 pixels across. Higher resolution gives you cleaner edges, better color blending, and a sharper final image. Professional sublimation design files often come in 6000 × 6000 pixels or larger, especially for kawaii mermaid patterns with intricate details like tiny shells or scale textures. When in doubt, preview the file at 100% zoom on your screen. If you see blurriness at full size, the printed result will be worse.
Color Profile Confusion: Getting Those Soft Pastels Right
Kawaii mermaid sublimation typically relies on a palette of soft pinks, aquas, lavender, and pale yellow. But the colors you see on your monitor may not match what transfers onto your substrate. This happens when you work in the wrong color space. Many people keep their images in sRGB, which works fine for screen display, but dye-sublimation printers perform best with ICC profiles tailored to your specific printer, ink, and paper combination. Without the correct profile, you may get muddy colors, a greenish cast on the skin tones of your mermaid character, or a sea that looks more teal than turquoise.
Practical steps to get vibrant colors: Before you start, request or create an ICC profile for your sublimation setup. If you buy designs from a professional creator, ask if they include a recommended color profile or if the file is already converted to CMYK or a custom RGB working space for sublimation. Doing a small test print on the same fabric you plan to use regularly will save you from wasting expensive blanks. Keep a log of the settings that produce the truest kawaii colors so you can replicate them every time.
Time, Temperature, and Pressure: The Hidden Variables
Even the most beautiful sublimation design will fail if your heat press settings are off. One frequent error is using the same time and temperature for every material. A kawaii mermaid design on a 50/50 polyester blend shirt might need 400°F for 45 seconds, while the same design on a hard substrate like a ceramic mug may require 380°F for 120 seconds. Some beginners assume higher heat equals better transfer, but that can cause the ink to bloom—softening the fine lines of the mermaid’s hair or the edges of a starfish—or worse, cause the substrate to scorch.
How to dial in your settings: Always reference the manufacturer’s guidelines for your blank. When in doubt, start with the lower end of the recommended range and increase gradually. Keep a pressure test strip handy: a piece of paper between the press and your blank should pull out with moderate resistance. If it slides out too easily, increase pressure. Also, remember that the type of polyester content matters. High-polyester fabrics (90% or more) take sublimation beautifully, but blends with cotton or elastane may need lower temperatures and longer dwell times. Run a small test with a 2-inch square of the design before committing to a full batch.
Substrate Selection: Not Everything Sublimes the Same
Another oversight is assuming any light-colored surface works. True dye-sublimation only bonds with polyester polymers or specially coated rigid surfaces. If you try to press a kawaii mermaid design onto a 100% cotton tote bag, the ink will wash out after a few cycles. Even on polyester, the weave density and finish affect how vivid the design appears. A matte surface may absorb ink a little differently than a glossy one, making the pastel bubbles look muted. Additionally, some “sublimation-ready” blanks from unknown sellers claim to work but have an uneven coating that results in patchy transfers.
Material considerations for mermaid designs: Stick with reputable blanks that clearly state “sublimation-friendly” and list the percentage of polyester. For soft home goods like blankets or pillows, look for a high polyester count in the cover fabric. For ceramics and metals, ensure the blank has a polymer coating. A simple scratch test (gently scratching an inconspicuous area with your fingernail) can tell you if the coating is uniform. If it flakes off, the blank will likely produce white spots in your print. Remember that kawaii mermaid designs often have fine text or tiny details (like “Mermaid Life” in cursive); these details disappear if the substrate doesn’t hold a sharp transfer.
Misidentifying Sublimation: Are You Using the Right Process?
Some newcomers see the term “sublimation” and assume it covers all heat-transfer methods. In reality, sublimation is a specific chemical process where solid ink turns into gas without passing through a liquid state, bonding with polyester molecules. This is different from vinyl heat transfer (HTV), which sits on top of the fabric, or direct-to-film (DTF) transfers, which use an adhesive layer. Grabbing a kawaii mermaid design meant for sublimation and trying to print it with a standard inkjet printer onto transfer paper for HTV will ruin both the paper and the design. The ink won’t gasify, and you’ll end up with a sticky mess or a faint stain.
Avoiding costly equipment errors: Confirm that your printer is equipped with sublimation ink (often labeled as “sublimation dye ink”) and that you are using sublimation paper, not regular inkjet paper. If you are new, read the packaging carefully before purchasing designs: files marked “sublimation only” are intended for that specific process. When you buy kawaii mermaid sublimation designs from online marketplaces, look for a clear statement “for sublimation use” in the description. Some sellers also provide a brief guide on paper type and press settings. If you have a regular printer, consider converting it to a dedicated sublimation printer by changing the ink and setting the printer profile accordingly—but that is a separate commitment with its own learning curve.
Skipping Pretreatments and Cleaning Steps
Many people think they can just place the paper on the blank and press. But dust, lint, or residual chemicals on the substrate can create white specks or ghost shadows, especially on coated hard goods. For fabrics, a quick lint roll before pressing removes tiny fibers that could block ink transfer. For mugs or tiles, wiping with isopropyl alcohol removes oils from handling. Also, some poly-coated blanks come with a thin protective film that must be peeled off before pressing. Failing to do so results in a cloudy, uneven print that doesn’t reflect the cute details—imagine a mermaid’s face partially obscured by a white haze.
Quick preparation checklist: Keep a lint roller, microfiber cloth, and 99% isopropyl alcohol in your workspace. Before you heat press any kawaii mermaid sublimation design, visually inspect the surface. For fabrics, also check for wrinkles; a thorough pre-press for 5–10 seconds will flatten them out, ensuring even contact. For tumblers and similar items, ensure the coating is clean and dry. These small steps take only a minute but can dramatically improve final quality, reduce waste, and save you from redoing transfers.
Downloading Designs from Unreliable Sources
The appeal of free or very cheap kawaii mermaid sublimation designs is understandable. But low-cost files often come with hidden issues: low resolution (as mentioned earlier), watermarks that may not be fully removed, missing color profiles, or bundled folders with mismatched themes. Worse, some files are resold by people who do not have the original commercial license, meaning you could face copyright issues if you sell products made from them. A mermaid with suspiciously fuzzy lines or a background that looks like it was cut out hastily is a red flag. Using such designs can tarnish your brand’s reputation if customers receive merchandise that looks amateurish.
Where to find quality kawaii mermaid sublimation designs: Invest in designs from established small artists or reputable design marketplaces that clearly state commercial use terms. Look for shops that provide examples of real printed products, not just digital mockups. Many artists offer test files or a sample pack so you can print a small item first to check quality. Also, read the license agreement: some allow unlimited commercial use while others cap the number of sales. A good designer will also include a help file with tips for their specific designs, such as recommended substrates or color tweaks. Spending a few extra dollars per design saves you time, frustration, and potential legal headaches later.
Ultimately, creating beautiful kawaii mermaid sublimation projects comes down to respecting the process as much as the art. Check your resolution, calibrate your colors, test your press settings, choose appropriate blanks, and source your designs carefully. When you attend to these practical details, the enchanting, soft-colored world of mermaids and kawaii style transfers faithfully onto your products—delighting both you and the people who receive them.