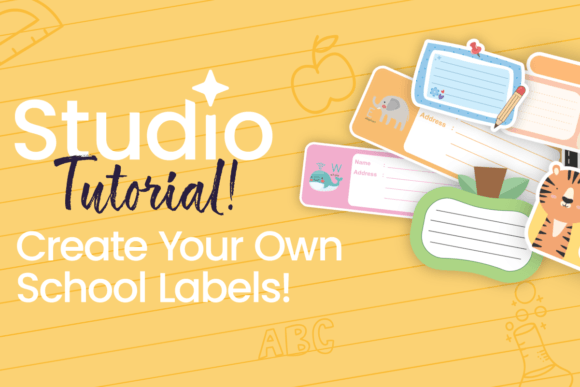
Create Your Own School Labels: Simplify School Organization
Every school year brings the familiar scramble of sorting supplies, labeling uniforms, and hoping that your child’s jacket actually makes it home. You have likely bought pre-printed labels in the past, only to discover they peel off after a few washes or fail to cover all the items your child takes to school. The solution is more practical than you might think: create your own school labels. This approach gives you full control over design, durability, and quantity, ensuring that everything from lunch boxes to gym shoes stays clearly marked for the entire school year. Instead of settling for generic stickers or expensive custom sheets, you can produce labels that exactly match your child’s needs, your organizational style, and your budget.
Why Generic Labels Often Fall Short
The challenges of lost belongings are well known to any parent. A single unlabeled water bottle can disappear within a week, and the classroom lost-and-found quickly becomes a graveyard of identical blue sweaters. Pre-made labels are convenient, but they come with limitations. They often lack the flexibility to label oddly shaped items like pencil cases or sports equipment. The font sizes may be too small for easy identification, and the adhesive might not withstand repeated trips through the dishwasher or laundry. When you create your own school labels, you address these pain points directly. You choose the material, the size, and the stickiness required for each specific item. This tailored approach dramatically reduces the stress of replacing lost gear and keeps your child’s belongings organized without constant reordering.
Getting Started with Your Own Labels
You might worry that creating labels from scratch is time-consuming or requires special equipment. In reality, there are several accessible methods that fit different comfort levels and resources. The most straightforward way to create your own school labels is to use a home printer and adhesive paper. Many templates are available online that work with standard word processing software. You simply type in the names, choose a clear font, and print. After cutting the labels, you can apply a clear sealant spray to make them waterproof. For those who prefer a more durable option, a vinyl cutting machine like a Cricut or Silhouette allows you to cut custom shapes and professional-looking labels that last through dozens of washes. Even a permanent marker on fabric tape can serve as a quick solution for labeling gym shoes or backpacks. The key is to match the method to the item and the expected wear and tear.
Tailoring Labels to Different School Needs
Not every label serves the same purpose. When you create your own school labels, you can design variations for different contexts. For soft items like uniforms and towels, consider iron-on labels or fabric stickers that bond with the material. For hard plastic lunch boxes and reusable water bottles, a waterproof vinyl sticker works best. For small items like calculators or binder dividers, a simple paper label covered with clear tape can provide sufficient identification. Batching your production by category saves time and ensures consistency. For example, you might create a set of uniform labels in one session, then focus on school supply labels separately. This methodical approach allows you to produce exactly what you need without waste.
Involving Your Child in the Process
One often overlooked benefit is that when you create your own school labels, you can involve your child in choosing colors or designs. This small act of ownership can make them more responsible for their belongings. A young child who picks a dinosaur-shaped label for their lunchbox is more likely to keep track of it. For older students, letting them choose a minimal, mature design reinforces their independence. This collaborative aspect transforms labeling from a chore into a back-to-school ritual that builds excitement and accountability. It also gives you a natural moment to discuss the importance of caring for their items, reducing the number of items lost over the school year.
Practical Design Choices for Durable Labels
Durability is the primary concern for school labels. When you create your own school labels, you control every factor that determines how long they last. Start with the right materials: polyester fabric labels for clothing, printable vinyl for hard surfaces, and laminated paper for low-moisture items. Size matters too. A label that is too small becomes illegible, while one that is too large might peel at the edges. Aim for a balance that fits the item without crowding. Including your surname and a phone number or class code is more effective than just a first name, because it allows lost items to be returned directly. Avoid overly ornate fonts; a clean sans-serif typeface is easiest to read from a distance. Color can also serve a practical purpose. If you have multiple children attending the same school, assign each one a specific color when you create your own school labels. This visual cue helps everyone quickly identify which item belongs to whom, both at home and in the classroom.
Common Situations Solved by Custom Labels
Consider these everyday scenarios where homemade labels make a real difference. At the start of the school year, teachers often ask parents to label everything. With a batch of printed labels ready, you can quickly mark a dozen notebooks, a ruler, a set of colored pencils, and a glue stick without having to hand-write each one. During sports season, you can label water bottles and practice jerseys with durable vinyl that resists sweat and repeated wash cycles. When your child goes on a field trip, adding a temporary label to a disposable bag or camera ensures it returns home. Over time, you develop a library of label templates that you can modify for different events or as your child grows. This system pays for itself after the first few labeling sessions, especially compared to repeatedly buying expensive pre-printed packs.
Handling Multiple Children and Shared Items
Families with more than one child face additional complexity. Hand-me-down uniforms and shared sports equipment need clear identification to avoid arguments over ownership. When you create your own school labels, you can design a system that works for shared items. For example, use a family surname label on communal gear like soccer balls or board games, and individual color-coded labels on personal clothing. This reduces confusion and helps each child feel their possessions are respected. You can also adjust label sizes as your children age. Younger kids benefit from large, picture-based labels, while middle and high school students prefer subtle, adult-looking labels that don’t stand out. This flexibility is impossible with store-bought sets, which come in fixed sizes and designs.
Budget Considerations and Long-Term Savings
The cost of pre-printed labels adds up, especially if you need multiple sets for different activities or replenish them mid-year. Creating your own labels requires an initial investment in materials like sticker paper or vinyl sheets, but the per-label cost is much lower. One pack of printable adhesive sheets can produce dozens of labels for a fraction of the price of a single custom order. When you create your own school labels, you also eliminate shipping times and the need to reorder when you run out. You can print exactly as many as you need, right when you need them. This convenience saves both money and time during the busy back-to-school season. Additionally, leftover materials can be used for other household organization projects, such as labeling food containers or storage bins, extending the value of your purchase.
Choosing the Right Tools and Materials
To get reliable results, invest in quality supplies. For printed labels, choose waterproof printable vinyl or label sheets designed for inkjet printers. For fabric labels, consider using a tape printer or iron-on transfer paper. If you prefer handwriting, permanent markers combined with clear packing tape can create simple, durable labels. When you create your own school labels, test your method on a sample item first. Wash a labeled sock or run a labeled water bottle through the dishwasher to ensure it holds up. Many online communities share tips for specific printers and materials, which can help you avoid common pitfalls like smudging or peeling. Taking the time to select the right combination for your needs pays off in labels that stay put.
Collaborating with Other Parents
Another practical strategy is to share your label-making setup with other parents. If you have a vinyl cutter or a reliable printing method, you can offer to create your own school labels for a neighbor or a friend in exchange for help with other tasks. Some parent groups organize label-making parties before school starts, where everyone brings supplies and produces labels together. This community approach reduces costs further and can be a social activity that eases the transition into the new school year. It also allows you to learn from others’ experiences, discovering which materials work best for specific items or how to handle tricky surfaces like silicone lunch boxes.
Taking It to the Next Level: Themed and Personalized Labels
Beyond basic identification, custom labels can become a source of joy for your child. When you create your own school labels, you can incorporate themes from their favorite books or hobbies. For example, a set of labels featuring dinosaurs or planets can make a child excited to bring their supplies to school. Older students might prefer minimalist designs or labels with motivational quotes. This personalization encourages them to take pride in their belongings. The process also teaches children about organization and responsibility. As they help design and apply labels, they learn that caring for their things is part of being a student. This educational benefit extends beyond mere labeling and contributes to their overall school readiness.
Practical Implementation: A Step-by-Step Outline
To put this into action, start by gathering your supplies: printable adhesive paper or vinyl, a printer, scissors or a cutting machine, and clear sealant if needed. Decide on a consistent font and format that includes your child’s full name and a contact detail. Next, measure the items you need to label to determine the appropriate size. Create a template in your preferred software, then print a test sheet on plain paper to check alignment and readability. Once satisfied, print on your label material. Allow the ink to dry completely before applying a sealant for extra protection. When cutting, take care to round corners slightly so they are less likely to peel. Finally, clean the surface of the item to ensure good adhesion before applying the label. Following this routine each time you create your own school labels will yield consistent, professional results.
The real value of making your own labels is the peace of mind that comes with knowing every item is clearly marked. Instead of worrying about lost property, you can focus on helping your child adjust to their new routines. The system is also sustainable; as your child grows or changes schools, you can update the labels accordingly without starting from scratch. Many parents find that after their first successful batch, they never go back to buying pre-made labels. The control, the savings, and the personal touch make it a superior choice for school organization.
Whether you have a single child starting kindergarten or a household full of teenagers heading to different activities, the ability to customize every label gives you an edge. You can produce labels that withstand the rigors of daily school life, and you can do it on your own schedule. Start small, perhaps with just the items that are most frequently lost, and expand as you gain confidence. The investment in time and materials is minimal compared to the reduction in stress and the tangible savings over the school year. Ultimately, when you create your own school labels, you are not just labeling belongings—you are building a practical system that supports your entire family’s school-day routine.